 ultimate-guide
How to Prepare for Your First Tattoo Appointment
Last Updated: November 1, 2026
Quick Summary
To prepare for your first tattoo, arrive rested, fed, hydrated, and informed: eat a solid meal within a couple of hours of your appointment, sleep a full night, drink water consistently in the days before, and moisturize the placement area daily for the week or two prior. Confirm your studio's licensing and sterilization practices, skip alcohol the night before, and wear loose clothing that gives the artist easy access to the area.
- Shave the placement area 24 to 48 hours before your appointment, never the morning of.
- Stop moisturizing on appointment day and arrive with clean, dry skin.
- Ask for a short break before you feel you need one, not after.
- Check the stencil in a mirror from more than one angle before the needle starts.
- Keep the bandage on for the time your artist specifies, then wash gently with fragrance-free soap.
Table of Contents
- Why Preparation Decides How Your First Tattoo Goes
- Health and Safety Screening Before You Book
- How to Evaluate an Artist and Studio for Your First Tattoo
- Your First Tattoo Checklist: Two Weeks Out to Appointment Day
- Skin Care and Hydration in the Weeks Before
- What to Eat Before a Tattoo and How to Sleep the Night Before
- What to Wear to a Tattoo Appointment
- How Long Before a Tattoo Should You Shave?
- Pain Expectations, Consent, and Your Right to Pause
- What to Expect During the Tattoo Process and First-Day Aftercare
- Frequently Asked Questions
Why Preparation Decides How Your First Tattoo Goes
Most people spend weeks choosing a design and almost no time preparing their body for the session. That imbalance is where first-timer problems start. A first tattoo is a minor wound that a trained artist turns into permanent art, and how you treat your body in the days before you sit down affects how well you tolerate the process and how cleanly the skin takes ink.
Clients who arrive rested, fed, hydrated, and informed generally handle a session far better than clients who roll in on three hours of sleep and an empty stomach. Preparation is not fussiness. It is the difference between a calm appointment and a miserable one.
Below, we break down exactly what to do, from health screening to first-day aftercare. The good news is that a solid tattoo preparation routine takes maybe twenty minutes of actual effort spread across two weeks.
Health and Safety Screening Before You Book
Before you pick a design, screen yourself honestly. A tattoo is a controlled skin injury, and certain health conditions change how you should approach it. If you take blood thinners, have a bleeding disorder, are immunocompromised, have poorly controlled diabetes, or are pregnant, talk to your doctor before booking anything. Artists are not physicians and cannot clear you medically.
Skin matters too. Active sunburn, eczema flare-ups, psoriasis plaques, cold sores, or a rash at the intended tattoo placement are reasons to reschedule. Tattooing over irritated or broken skin invites infection and heals unevenly.
Ask about the studio's bloodborne pathogen practices up front. In the United States, tattoo establishments are regulated at the state and local level, and requirements vary, so confirm that your studio meets or exceeds what your local health department requires.
Questions to Ask About Sterilization and Licensing
Use this list before you put down a deposit:
- Is the studio licensed and inspected by the local health authority?
- Are needles and tubes single-use and opened in front of me?
- How is equipment sterilized?
- Are artists trained in bloodborne pathogen control?
- What is the cleaning protocol for stations between clients?
- What is the policy on gloves and barriers during the session?
If any answer feels evasive, walk. A studio that cannot explain its sterilization process in plain language is not one to trust with an open wound. For context on national bloodborne pathogen standards that studios should be following, the CDC guidance on bloodborne pathogens is a useful reference point.
How to Evaluate an Artist and Studio for Your First Tattoo
A first tattoo deserves an artist whose portfolio matches the style you want, not just the closest shop with an opening. But style is only half the decision. The other half is whether the studio can prove, in plain language, that it protects you from infection and treats you like a partner in the process. Most preparation guides stop at "check the portfolio." Here is the fuller evaluation we walk every new client through.
Start With the Portfolio, but Read It Carefully
Look for healed work, not only fresh photos. Fresh tattoos photograph beautifully; healed ones reveal how steady the linework and saturation really are. Ask to see a healed piece in the style you want, ideally six months old or more. If an artist only shows fresh work, that is not automatically a red flag, but it is a fair question to ask.
Match the style, not just the skill. A brilliant realism artist may not be the right person for fine-line script, and a walk-in shop may not have anyone who specializes in the design you have in mind. Read reviews for patterns, not single complaints. Consistent mentions of cleanliness, patience, and clear communication matter more than one glowing post.
Verify Licensing and Hygiene Before You Put Down a Deposit
In the United States, tattoo establishments are regulated at the state and local level, and requirements vary. That means the burden is on you to confirm the studio meets or exceeds what your local health department requires. Use this checklist at the consultation:
- Is the studio licensed and inspected by the local health authority, and can they show the current permit?
- Are needles and tubes single-use and opened in front of you?
- How is reusable equipment sterilized, and is there a working autoclave with spore-testing logs available on request?
- Are artists trained in bloodborne pathogen control, and can they describe their glove and barrier routine?
- What is the cleaning protocol for stations between clients, including chairs, trays, and clip cords?
- Is there a sink or hand-sanitizing station in the work area, and do artists wash hands before gloving?
If any answer feels evasive, walk. A studio that cannot explain its sterilization process in plain language is not one to trust with an open wound. For context on national bloodborne pathogen standards that studios should be following, the CDC guidance on bloodborne pathogens is a useful reference point.
Ask How the Consultation and Design Process Works
When you book a consultation, pay attention to how much time the artist spends understanding your idea before discussing price.
Ask directly: Do you do fully custom work, or do you adapt existing designs? How many revisions are included? What happens if I want to change the design on the day? Will you show me the drawing before the appointment, or only at the stencil stage? A professional artist welcomes these questions and will explain the trade-offs honestly. If an artist brushes off design questions or pushes you toward a flash piece you did not ask for, that is information.
Check Communication and Comfort
You will spend hours with this person, often in close physical proximity, sometimes in pain. A short conversation tells you a lot. Does the artist listen without interrupting? Do they answer hygiene questions directly? Do they explain what will happen step by step? Do they respect your budget and timeline without pressure? A studio that rushes you off the phone or dismisses your concerns before you have paid a deposit will not become more patient once the needle is out.
Red Flags Worth Walking Away From
- The shop cannot or will not show a current health permit.
- Needles or tubes are pre-opened or set out before you arrive.
- The artist discourages questions about sterilization or calls them unnecessary.
- The price is dramatically lower than every other quote you received, with no clear reason.
- The studio pressures you to book and pay a deposit before you have seen the design or met the artist.
None of these guarantees a bad outcome, but together they shift the risk onto you. For a permanent, open-wound procedure, that is a trade most first-timers should refuse.
Your First Tattoo Checklist: Two Weeks Out to Appointment Day
Here is the realistic timeline we give every new client. Print it, screenshot it, or pin it to your fridge.
| When | What to do | Why it matters |
|---|---|---|
| Two weeks before | Confirm appointment, review aftercare info, stop heavy drinking | Gives your body a clean baseline |
| One week before | Moisturize daily, avoid sun exposure on the placement area | Healthy, hydrated skin takes ink better |
| 2-3 days before | Prioritize sleep, drink water consistently | Reduces fainting risk and improves pain tolerance |
| Night before | Full night's sleep, no alcohol, pack your bag | Arrive calm and organized |
| Morning of | Eat a solid meal, shower, wear loose clothing | Stabilizes blood sugar and keeps the skin clean |
| At the studio | Bring ID, water, snacks, and your design references | Keeps the session smooth |
The single biggest mistake we see is treating the appointment like a quick errand. Block out the whole day. Sessions run long, and rushing yourself adds stress you do not need.
Skin Care and Hydration in the Weeks Before
Your skin is the canvas, so treat it like one. In the two weeks before your appointment, moisturize the tattoo placement area daily with a gentle, fragrance-free cream. Skip harsh exfoliants, retinoids, and any product that leaves the skin red or peeling. You want calm, intact skin on appointment day.
Hydration works from the inside too. Drink water consistently in the days leading up to your session rather than chugging a bottle in the parking lot. Well-hydrated skin is more pliable, which helps the artist work efficiently and can make the experience more comfortable for you.
Avoid sun exposure on the area. A sunburned back or shoulder is a rescheduled appointment, and tanned, damaged skin heals less predictably.
Should You Moisturize Before Getting a Tattoo?
Yes, but stop on the morning of your appointment. Moisturize daily for the week or two before, then arrive with clean, dry skin. Do not slather on lotion right before you sit down, because the artist needs to prep and clean the area, and product residue interferes with that. Shower as normal, skip the lotion, and let the studio handle prep.
What to Eat Before a Tattoo and How to Sleep the Night Before
Eat a real meal within a couple of hours of your appointment. Something with protein and complex carbs, like eggs and toast or a chicken sandwich, keeps your blood sugar steady through a long session. Arriving hungry is the most common cause of lightheadedness and fainting we see in the chair. Bring a snack and water for longer sessions, and eat it even if you do not feel hungry.
Sleep is the other half of the equation. A full night's rest before your appointment improves pain tolerance and steadiness. Skip alcohol the night before, since it thins the blood and can affect bleeding during the session. If nerves keep you up, that is normal, but do your best to protect those hours.
What to Wear to a Tattoo Appointment
Dress for access and comfort. Wear loose clothing that lets the artist reach the placement area without you undressing awkwardly. For a shoulder or upper-arm piece, a tank top or a loose short-sleeve shirt works well. For rib or back work, a button-up or a top you can comfortably adjust helps. Avoid tight waistbands, delicate fabrics, and anything you would be upset to get ink or ointment on.
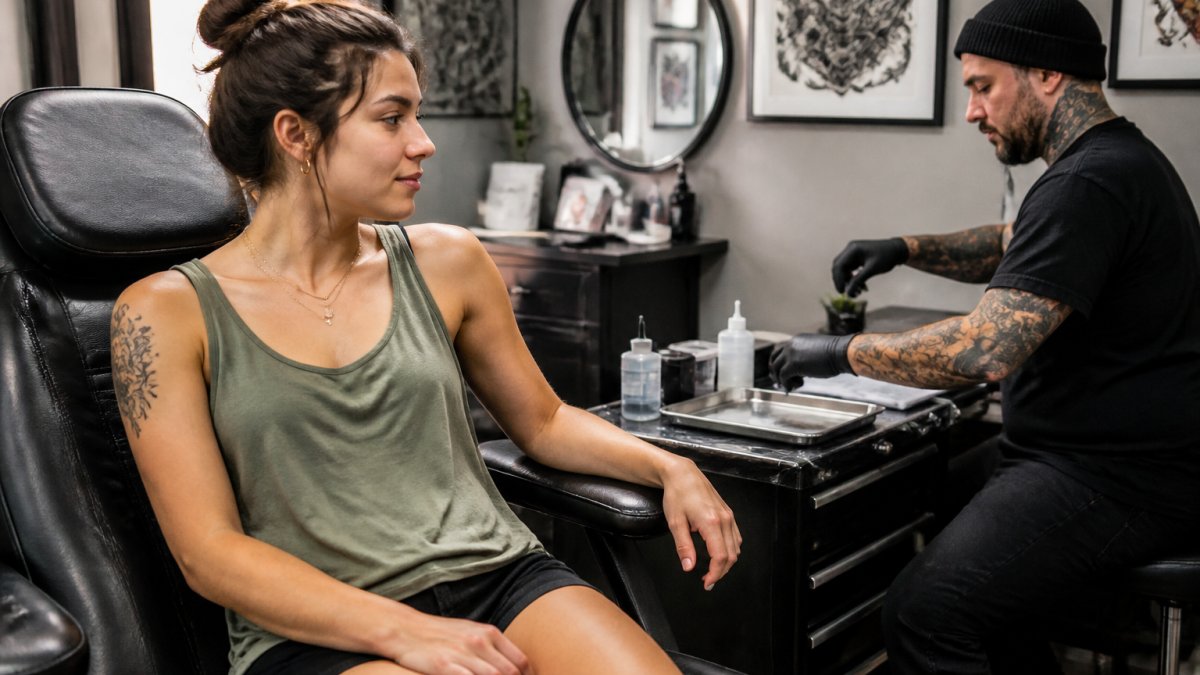
Bring layers. Studios run cool, and a long session can leave you chilled. Comfortable clothing is not a small detail; it directly affects how still and relaxed you stay.
How Long Before a Tattoo Should You Shave?
Shave the area 24 to 48 hours before your appointment, not the morning of. Shaving too close to your session leaves micro-cuts that irritate the skin and raise infection risk. If you are unsure, ask your artist whether they prefer to shave the area themselves.
Never wax or use depilatory creams on the placement area in the week before. Both leave the skin sensitive and can cause reactions that force a reschedule.
Pain Expectations, Consent, and Your Right to Pause
Yes, a first tattoo hurts, but most people describe it as tolerable rather than unbearable. Placement changes everything: fleshy areas like the outer arm are gentler, while ribs, spine, and ankles sting more. The outline tends to be the sharpest part, and many clients find the shading more manageable. Session length matters too. A small piece may be over in twenty minutes; a larger one can run several hours, and discomfort compounds with fatigue.
What the Sensation Actually Feels Like
Most clients describe the outline as a hot scratch or a vibrating sting, and shading as a broader, duller burn. The first few minutes are often the hardest because your body is deciding how to respond. Many people settle into a rhythm after ten or fifteen minutes. If you have a low pain tolerance, say so at the consultation. An honest artist can adjust the plan, split a large piece into multiple sessions, or recommend a placement that is easier to sit through.
Safe Ways to Manage Discomfort
- Eat a real meal within a couple of hours of your appointment so your blood sugar stays steady.
- Sleep well the night before; fatigue lowers pain tolerance more than most people expect.
- Bring water and a snack, and eat even if you do not feel hungry.
- Use controlled breathing: slow inhale through the nose, longer exhale through the mouth.
- Ask for a short break before you feel you need one, not after.
- Bring headphones or an audiobook if the studio allows it, but keep one ear free so you can hear the artist.
- Skip alcohol and blood-thinning medications unless a doctor has told you otherwise; both can affect bleeding.
Ask before using numbing creams, since some products change skin texture and can affect how ink takes. Policies vary by shop.
The Stencil Approval Moment
Before the needle starts, the artist cleans the area and applies a stencil, then confirms placement with you. This is your best chance to catch a problem. Stand up, look in a mirror, and check the position from more than one angle. Ask the artist to adjust the stencil if it sits higher, lower, or at a different angle than you pictured. Repositioning a stencil takes seconds; repositioning a healed tattoo takes laser sessions.
If the design itself has changed since your consultation, ask to see the drawing again before the stencil goes on. It is normal to feel rushed in the chair, but a professional artist would rather spend five extra minutes on placement than have you unhappy with permanent work.
Consent Is Ongoing, Not a One-Time Signature
You are in control. You can ask for a break, ask the artist to pause, or stop the session entirely. Consent is ongoing, not a one-time signature. If you want to change the design, resize it, or move it before the needle starts, say so. If you feel faint, speak up immediately, because artists deal with this regularly and know how to help. If you need to stop for the day, you can; many artists will schedule a follow-up session to finish the work.
When to Speak Up Before the Session Starts
Tell your artist up front if you are prone to fainting, have a bleeding disorder, take blood thinners, are pregnant, or have a skin condition at the placement site. These are not reasons to be embarrassed; they are reasons to plan. The artist may adjust the session length, the placement, or the aftercare instructions, or recommend you talk to a healthcare provider first. For a permanent procedure, that conversation is worth having before the needle is out.
What to Expect During the Tattoo Process and First-Day Aftercare
Expect a consultation and stencil placement first, then the tattoo itself. The artist cleans the area, applies the stencil, and confirms placement with you before starting. Sessions can run from under an hour to several, depending on size and detail. Bring water and snacks, and expect to sit still for stretches.
Aftercare starts the moment you leave. Keep the bandage on for the time your artist specifies, then wash gently with fragrance-free soap and pat dry. Keep the new tattoo clean, avoid soaking it in baths or pools, and follow your artist's moisturizing instructions. Watch for spreading redness, increasing pain, pus, or fever, and contact a healthcare provider if any appear. For general wound care guidance, the American Academy of Dermatology tattoo care tips is a reliable starting point, and your artist's instructions take priority.
If you want a studio that treats preparation and safety as seriously as the art itself, that is exactly what we built Indelible Ink Tattoo Studio 2.0 around. The studio offers a private setting, medical-grade safety standards, and a husband-and-wife artist team. Get started with Indelible Ink Tattoo Studio 2.0 and book a consultation for a first tattoo you will be glad you planned for.
Frequently Asked Questions
What should you do when you get your first tattoo?
Book a consultation before the appointment so you and the artist agree on design, size, and placement. In the two weeks before, moisturize daily with a fragrance-free cream, drink water, and avoid alcohol for 24 hours. On appointment day, eat a solid meal at least an hour beforehand, wear loose clothing that exposes the placement area, and arrive with a photo ID. Bring water and a snack, and plan a light schedule afterward so you can leave the bandage on and rest.
How long before a tattoo should you shave?
Shave the area 24 to 48 hours before your appointment, never the morning of. Shaving too close to the session leaves micro-cuts that irritate the skin and raise infection risk. Use a clean razor and shave with the grain, then moisturize gently. Many artists shave the site themselves right before inking, so if you are unsure, ask your artist what they prefer. Avoid waxing or harsh exfoliation in the week before.
What should you eat before getting a tattoo?
Eat a solid meal with protein and complex carbohydrates at least an hour before your appointment. Eggs, oatmeal, a sandwich, or rice and chicken all work well. Low blood sugar is a common cause of dizziness and fainting during a first tattoo, so do not skip the meal even if you are nervous. Bring a snack and water for longer sessions, and avoid alcohol entirely for 24 hours before and after.
Can I use Vaseline on my new tattoo?
No. Petroleum jelly is too heavy for a fresh tattoo and can trap bacteria, clog pores, and pull ink out during healing. Use a thin layer of fragrance-free tattoo aftercare ointment or lotion instead, as directed by your artist. Wash the tattoo gently with fragrance-free soap and lukewarm water, pat dry with a clean paper towel, and apply a light layer of aftercare product. Call the studio if you see spreading redness, pus, or fever.
Should you moisturize before getting a tattoo?
Yes, moisturizing daily for one to two weeks before your appointment helps skin stay hydrated and easier to tattoo. Use a gentle, fragrance-free cream and apply it after showering. Skip heavy lotions, scented products, and exfoliants on appointment day, and do not apply moisturizer to the site right before your session unless your artist asks you to. Hydrated skin tends to take ink more evenly and heal well.
What should you bring to your first tattoo appointment?
Bring a valid photo ID, water, a snack with protein, and a phone charger for longer sessions. Wear or pack loose clothing that gives the artist clear access to the placement area, such as a tank top for shoulder work or shorts for a thigh piece. Bring reference images of designs you like and a list of questions about aftercare. Leave jewelry, tight waistbands, and heavy bags at home so you can sit comfortably.
